 |
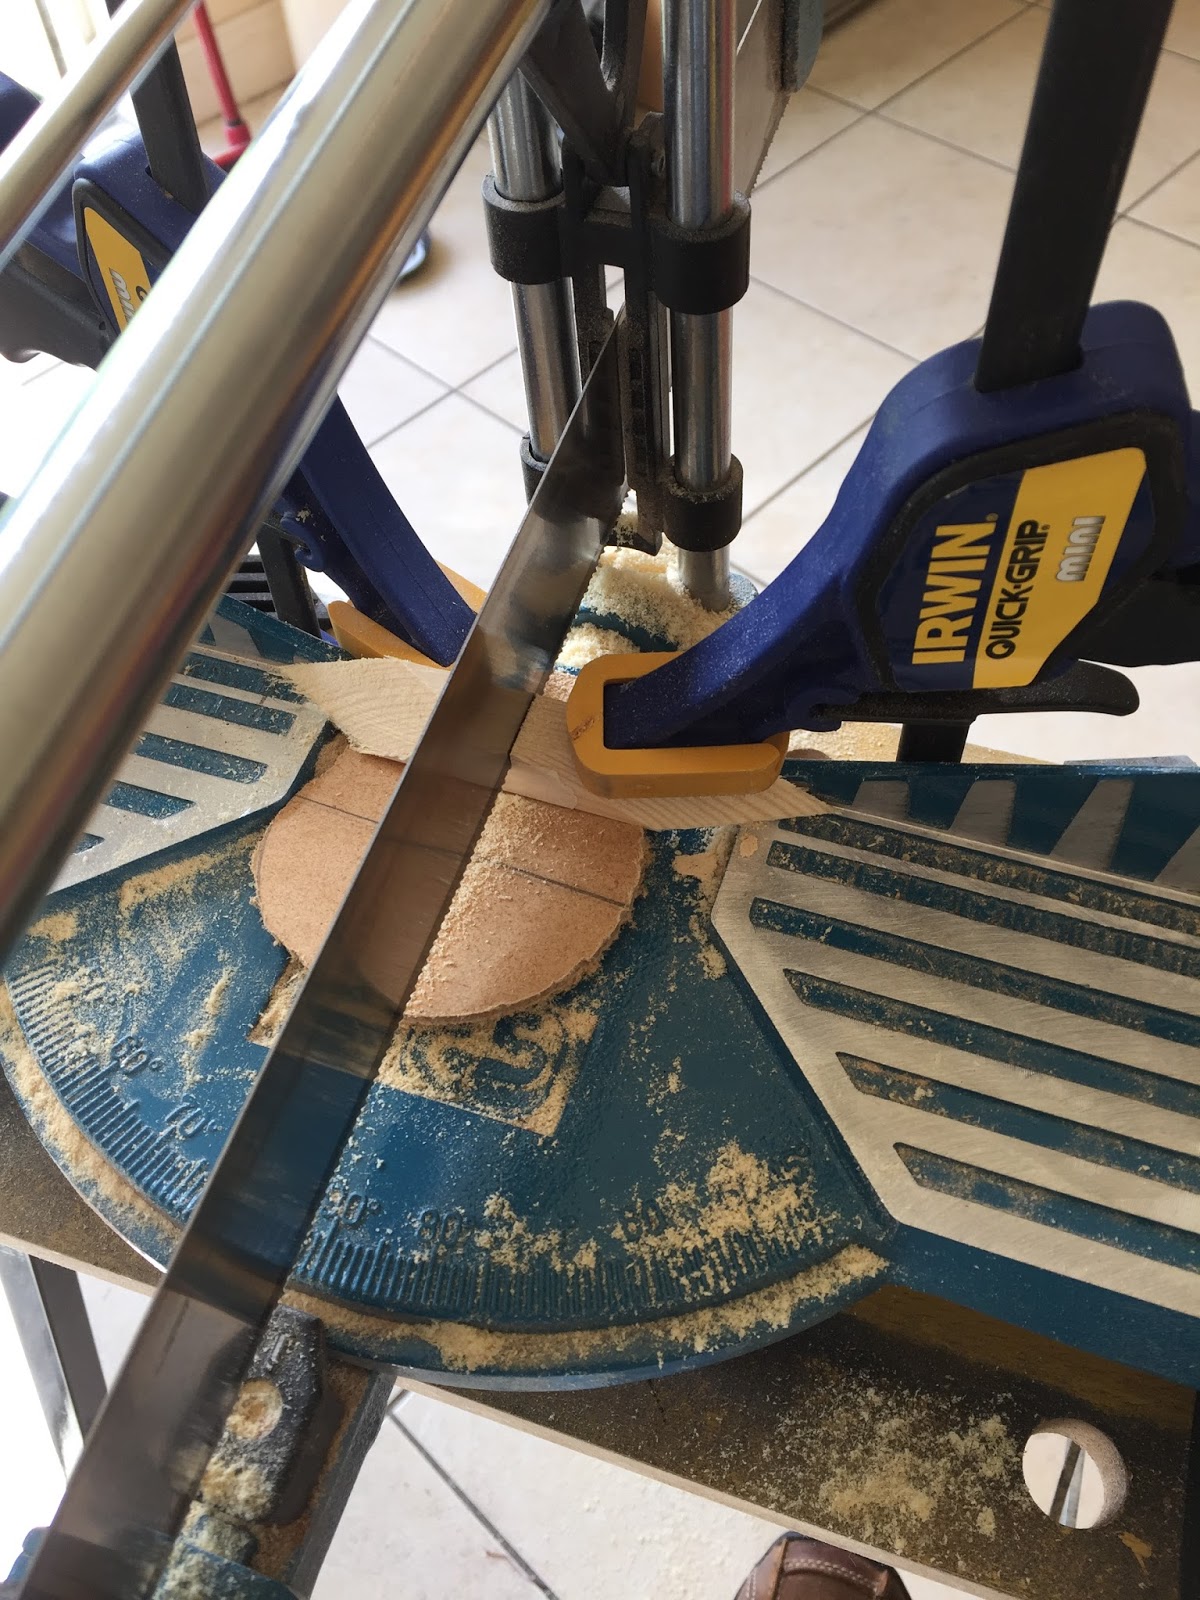
| Tape? |
The picture above shows a 22mm dowel about to be cut. The tape is there in the middle of the cut to stop the wood tearing off underneath as the saw breaks through. Sometimes the tear off doesn't matter as you'll have a pommel or head piece obscuring the damage - But, if you're making the kerux item, or wand etc, then you'll need tape - it helps keep it clean. Unless your wood is really cheap and then the tape will tear wood off also ;)
 |
| Clean(er) cut. |
Sanding is a fairly simple process. Start with a rougher grit 60/80 and then move onto a 200 or 400 for finishing. If you skip this process, the priming/painting will look bad - some prime, some don't.
 |
 |
These points are made from 15mm square slip and a 70 degree cut to make the face of it. I had to make my own jig to cut these things. If you own a good mitre saw then you'll know how to cut this anyway.

Here's the pictures of my jig. It's rough, but got the job done. The square slip is held at 45 degrees fairly tightly. There are going to be errors as this is all done by hand - don't obsess too much as these items are not stared at too closely.


Here's an uncut slip and the jig clamped in position - you can now see the angle of the face that is about to be cut.


70 degrees on the mitre saw - the jig at 90. Here you can see a clamp holding the slip in place.


Ok, we have our fancy point now. We rotate the slip and cut the other end now (you can see a butress in the jig design - this is to deliberately give me the right length for the points when we rotate the slip around.


Splitting the slip - awkward. If anyone want to buy me a decent Makita mitre saw... feel free!

Then we have the 6 we need.

The ends are cut and then sanded down to give the curved end. This just gives a nice shape once we assemble it later - This design isn't in any books - It's just an adaption of a Masonic 6 pointed crown.


Next to make the head pieces 'body'. I opted for a heavier wood to give some weight to the feather light pine being used for the sceptre shaft. We need to make 2 hexagons.


This mahogany is 45mm wide - this is too wide for what we need and we'll make use of the offcuts for another sceptre after this one. We are aiming for just over an inch for the edges.


You can see the excess here, we'll remove that now. (we need 4 of these - 2 for each hexagon)


Hexagon halves now glued, and then those are glued/clamped together. Don't worry too much about gaps. You can use filler, but we're going to carve this away shortly.


Now you can see the points forming up on the hexagons


We need to mark the drilling points next. We can just glue the points on - they will get knocked off if the sceptre accidentally falls down.

Sanded and filled the top (this won't get chiselled, so can be prepared now)

Next we drill the 22mm hole for the shaft and the holes for the screws. We start with smaller hole for the screw itself and THEN the the hole for the screw head to be recessed. Those larger ones don't go all the way down (hence the drills depth is limited here)


Next we mark out the rough area we are going to shave off (With a Dremel)


You can start to see some form to the hexagons now.


Then the next stage is marked out roughly - But more care now as we approach the final shape.

Here the final shape is done - It's not 100% accurate, but overall is fine!


Note the smaller holes here - these are when the screws will hold the points on.


Next we mask the top and leave some tape roughly where the points will be.


After the painting and gold leaf applied, the points are glued to the head before being screwed.


Looks a bit shabby, but ready for the screws to be recessed underneath.

I'll move onto the hardest part - The rings. To cut these straight with a manual saw is no fun. I recommend that you check the level of your saw and blade before embarking on this project. If you get close, don't mess with it!


After you finish the disks, sand faces and sides.


Next we need to mark the centers. This tool helps, but you can make your own for the job if you need it.

Rotated and marked again - giving us the center.


Next we drill out the centers. Too much pressure will explode the ring (and yep - they go out in style) - If you think doing a thicker segment helps, it doesn't and can ignite cheap drills with the stress of going so deep. Here's a heavy vice for the drilling.

So we have the drill setup and ready to go. Goggles/gloves a must for this. Everything clamped and secure.


After that, we apply gold leaf, and you'll need some baby talc. The baby talc is rubbed over the sceptre shaft to slide these on easily. Don't forget to mark where the rings are going, and to put them BEFORE the head or pommel :)

These are slip down onto a fair amount of glue.

The binding you see here for the grip is 1" felt and glued on with the same wood glue.

The pommels are shown as a disk that is probably taken from the Masonic designs originally. The Golden Dawn versions contain sepherophic connotations. The 35mm dowel is cut to 26mm and drilled with the 22mm bit for the shaft.

Painted and gold circle added.

Finished and then aged with 'peat brown' ink (an easy way to add years of use/wear and tear!)


Enjoy! - and please ask any questions!
No comments:
Post a Comment